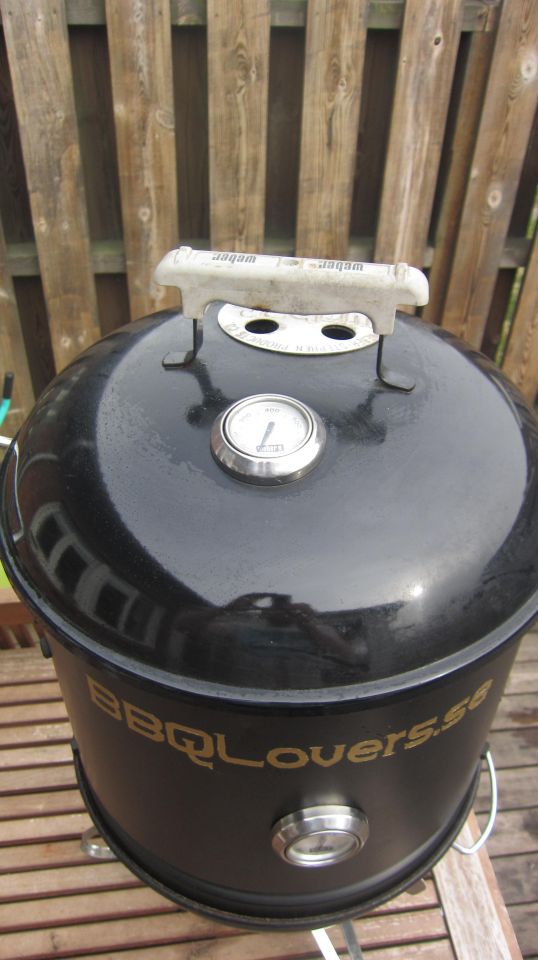


How to Build a Mini Weber Smokey Mountain
I’ve been asked a lot how I built my mini smoker. It works exactly like a regular smoker such as the Weber Smokey Mountain. That’s why I call it the mini WSM.
Often when you’re only cooking for yourself and your family, a big smoker feels like too much for, say, two pieces of pork collar or a few ribs. That’s why I use my mini WSM almost 90% of the time when I’m going to smoke and do proper low and slow. The big advantage is that it uses far less fuel, i.e. briquettes. I usually fill it with one load, and it holds the same temperature for almost 8-10 h, no lie.
It’s also easy to move around and put away. Maybe you want to bring it along on a camping trip.
It’s very easy to build.
Once it’s done, you’ll find the basics of indirect grilling in our guide to grilling methods.

You will need:
- 1 Weber Smokey Joe
- Seafood steamer (simply a large pot that fits on the bottom of the grill and that the lid fits on). I bought THIS ONE from Amazon. It fits perfectly.
- A thermometer. I use Weber’s thermometer for the One-Touch grills (I have two on mine, one that measures at the lower grate and one in the lid)
- Short screws and matching nuts
- 1 extra grate for the Weber Smokey Joe
- Heat-resistant spray paint
Here’s how:
Start by drilling a lot of small holes in the bottom of the pot. They should cover the whole bottom. If you’re a perfectionist you drill the holes symmetrically, otherwise it makes no difference, as long as there are a lot of holes.

Next, decide where you want the cooking grates placed and drill holes for them. Put the screws in from the outside and fit the nuts on the inside. (Note that the screws in the picture are too long. I found that out when I was going to put the grates in. There was simply no way to get the lower one in, so I just had to swap the screws.)
Once you’ve done this, it’s time to place the thermometer. I’ve put one to measure the temperature at the lower grate and one in the lid.
Drill the hole for the thermometer in the pot, but don’t fit it until you’ve finished painting.
When you make the hole for the thermometer in the lid, keep in mind that it’s enamel and it cracks easily.
You solve that by putting a piece of masking tape where you want the thermometer and using an awl to make a mark. Then drill through the enamel. Some care is needed at this stage. Unfortunately I didn’t take any photos when I did this.
Now it’s time to paint. You can choose any color you like, just make sure it’s heat-resistant. You can find these spray paints at paint shops and well-stocked hardware stores.
Spray from a moderate distance so you get an even layer of paint. Watch out so it doesn’t get too thick and start to run. It’s better to spray several times than to apply too much the first time.
I chose to put a design and text on my smoker. Start with the base coat.
Then print out the design you want.
Then tape a layer of masking tape where you want the logo or text.
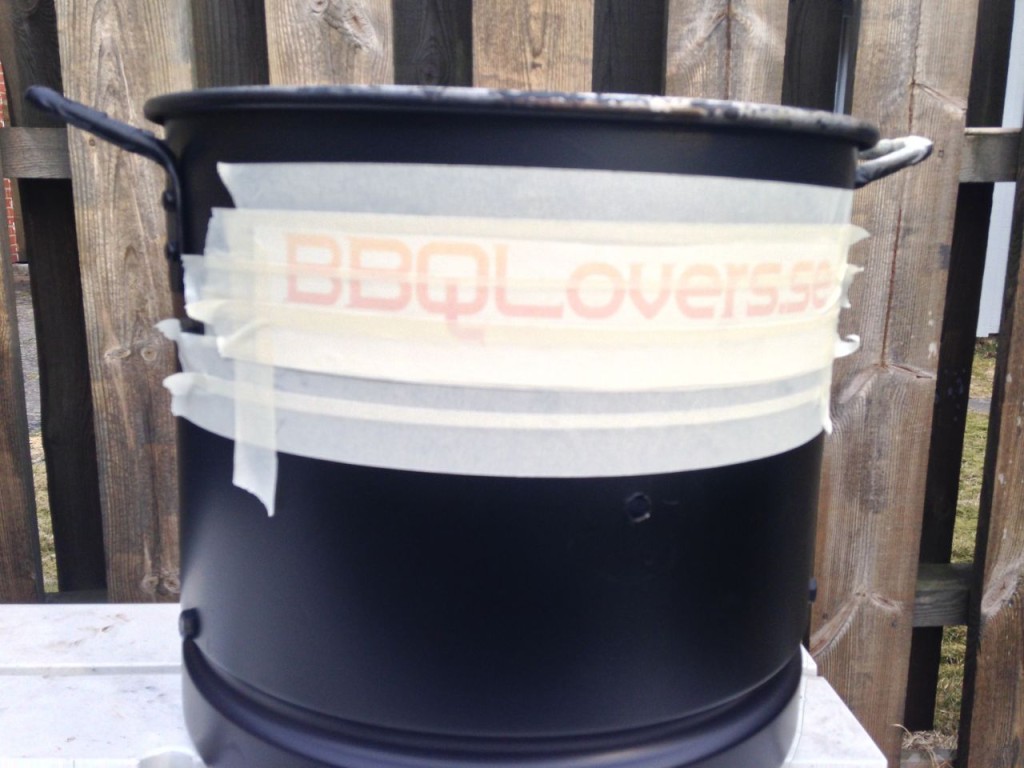
Then tape over your logo or text with another layer of masking tape. Then cut out the text or logo so that only it is visible and the rest around it is covered with masking tape.

Spray your text or logo with the paint you want.
Done.

Now you have your own mini WSM.