
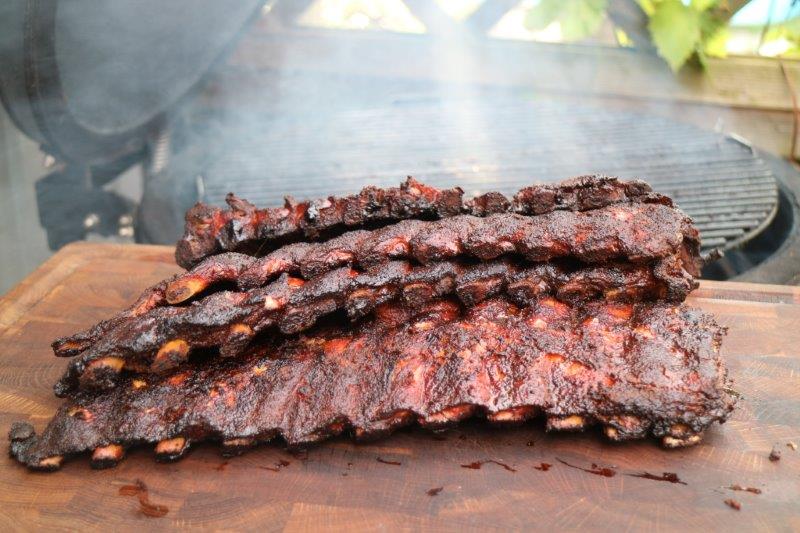

Why ribs are at the heart of BBQ
There’s a particular moment when you lift a rack with the tongs, let the weight do the work and watch the surface crack as lightly as the glaze on a donut. The smoke lies thin and blue, the sweetness from the glaze’s last minutes has just set, and you hear that faint creak as the connective tissue gives way. For me those seconds are the answer to why I love ribs. They are BBQ in distilled form: simple raw material, slow transformation and all that nerdiness that makes two hours feel like two minutes – or the other way around. Ribs aren’t just food; they’re proof that you can read fire, understand meat and have the patience to let chemistry and physics work for you.
The beauty of it is that ribs hold both clear rules and room for personality. You can go Memphis dry and let the rub play the lead. You can go Kansas City wet, with a shiny, caramelized glaze that glitters in the evening sun. You can keep them precise with a light “bite”, or take them all the way to soft, as long as you know why. In this guide I take you through everything – from what the cut actually looks like on the inside, via trimming and the chemistry of the rub, to heat, smoke, methods, spritz, wrap, glaze, troubleshooting and serving. The goal is simple: that you’ll be able to make ribs in a way that feels like yours, and that works every time.
Anatomy and cuts – the foundation that decides everything
If you understand how the ribs are built, you also understand why different methods behave the way they do. Ribs aren’t just bone with a little meat on it – they’re a balance of muscle fibers, fat, cartilage and bone that all react differently to heat, smoke and time.
Baby back, spare ribs and St. Louis – what’s what?
-
Baby back ribs (“kamben”)
Come from the upper part near the spine, where the pork loin sits. They’re shorter, slightly curved and usually leaner. The muscle fibers here are a bit “finer” – they get done faster, but can also turn dry if you cook them too hard. Typical weight per rack: about 12½ oz–1 lb 5 oz, depending a little on how much trimming there is. -
Spare ribs (“bröstspjäll”)
Sit further down toward the rib cage. More meat between the bones, more fat and often a more even, flat shape. That makes them forgiving and full of flavor. There is also more cartilage here, and sometimes parts of the breastbone structure are left on when they haven’t been trimmed. Typical weight per rack, roughly: 1 lb 1¾ oz–2 ¼ lb. -
St. Louis cut
A trimmed version of spare ribs where the breastbone section, cartilage and “rib tips” are cut off, so you get straight edges and an even thickness. The advantage is even cooking and nice slices. St. Louis is a favorite in competition settings because every bone becomes “presentation-friendly”. These usually have more of the belly side left on and are meatier. That also makes them heavier, and a solid piece of St. Louis ribs can weigh up to 4 ½ lb That also means they take a little longer to cook. -
Rib tips
What gets cut off when you make St. Louis: small, meaty pieces with cartilage. Fantastic to smoke separately as snacks – think “candy bag, BBQ style”.
Why it matters:
Baby backs have less collagen-rich tissue and a lower fat content → they need less time and less aggressive handling in the wrap/glaze. Spare ribs/St. Louis have more fat and connective tissue → they handle a longer journey, give deeper flavor and develop a heavier bark.
Swedish vs American cuts – how to order the right one
In Sweden you’ll often see “revbensspjäll”, “kamben” (baby back) and “bröstspjäll” (spare ribs). If you want St. Louis – say you want spare ribs (“bröstspjäll”) trimmed to straight edges, without the breastbone section and cartilage. Good communication with the butcher is half the battle. A few phrases that help:
-
“I’d like baby back ribs (“kamben”) from the back, preferably with a thin outer fat cap left on.”
-
“Can you make a St. Louis cut from the spare ribs – straight edges, remove the breastbone and cartilage?”
-
“Please leave a little meat on the outside – I’m cooking low & slow and want surface fat for flavor.”
Björn’s tip: Iberico spare ribs are in another league when it comes to fat quality and nutty sweetness. They often finish faster than you’d think – plan with some margin, keep an eye on them at the end and go by feel.
What’s actually on a rack (and why you sometimes should trim it off)
A rack can come with membrane, loose flaps of meat (the so-called “skirt”), uneven ends and fat that doesn’t render soft. All of this affects:
-
The membrane (the thin film on the bone side) is tough and blocks rub and smoke from getting in. Take it off and you get better spice contact and a more pleasant bite.
-
Skirt – the loose “skirt” toward the abdominal cavity – tends to dry out and can throw off the timing. I trim it off and save it as a cook’s snack.
-
Sharp corners and thinner parts burn and dry out first. Tear them off, round them off, or protect the most exposed parts with a little fat/foil.
Björn’s tip: The easiest way to pull the membrane is with a piece of paper towel. Grip is everything. Pry up a corner with a thin knife, pinch hold, pull evenly.
Anatomy drives the method – why different rib types behave differently
Ribs are cooked with radiant heat (from embers/fire/grate), convection (hot air circulating) and conduction (contact with the grate/foil). The shape of a rack determines how much each phase matters:
-
Baby backs are slightly rounded → the outer edges take up heat differently from the middle. They feel done earlier but can fool you: the middle section may want a few more minutes for exactly the right “bite”.
-
Spare ribs/St. Louis are flatter and heavier → better for even bark and a stable journey in the smoker. They respond more clearly to 3-2-1/2-2-1 logic (more on that in the methods section).
Packaging, brine and “pre-seasoned” – always read the fine print
Swedish store shelves often offer brined (pre-marinated, “Mörmarinerade”) or pre-seasoned ribs. That can be convenient, but brine with phosphate and sugar affects surface reactions and texture. If you want full control: ask for natural racks. Then you control the salt, sweetness and surface chemistry yourself.
Björn’s tip: If you cook pre-marinated ribs anyway – rinse them quickly, dry thoroughly and apply a thin rub on top. Lower the sweetness of your glaze at the end; otherwise you risk a burnt surface before the meat is exactly where you want it.
Trimming, membrane and prep – the road to even ribs
The first thing I do when I get a rack of ribs home isn’t to light the grill. It’s to lay the piece on a cutting board, get out a sharp knife and start reading the meat. A rack tells a whole story about how the pig was cut, how much fat is left and which parts will behave differently once the heat hits. And this is where trimming decides whether you get even, beautiful ribs – or a painful mix of burnt edges and tough membranes.
The membrane – the thin but decisive layer
On the back of almost every rack sits a gray-white, semi-transparent membrane. It looks harmless, but it works like a rain jacket: the rub stays on the surface and the smoke bounces off. It’s also tough to chew, and that makes the whole experience worse.
This is how I remove it:
-
Poke a thin knife or a spoon under a corner of the membrane, usually at one of the middle bones.
-
Lift carefully so you get a small tab up.
-
Take a piece of paper towel, pinch hold of the tab and pull straight off.
-
If it tears, start over at the next bone.
Sometimes you get the whole thing off in one sweep, sometimes you have to work in sections. But the reward is huge: ribs that take on flavor on both sides and a bite that feels clean and even.
Björn’s tip: Leave the membrane on one rack sometime, just to compare. You’ll notice how much it affects the depth of flavor from the rub and the smoke.
“Skirt” – the flap of meat that ruins evenness
On the inside of the racks there’s often a loose flap of meat, sometimes called “skirt”. It’s thin, low in fat and gets done long before the rest. If you leave it on, it burns or dries out. I simply cut it off, sometimes season it and throw it on the grate as a cook’s snack. A couple of minutes over high heat and you have a preview of what’s waiting.
Uneven edges and thickness
Ribs are rarely perfect to begin with. One end can have more cartilage, the other more meat. The sharp corners dry out first, while thicker parts take longer. Here, trimming is about geometry.
-
I round off the corners so the heat spreads more evenly.
-
I cut away bits of cartilage and loose lumps of fat.
-
If I have really uneven racks, I sometimes cut the whole piece down to an even “St. Louis cut”.
The result is a rack that cooks itself more evenly, and where every bone gets about the same amount of time.
The fat – keep it or remove it?
Fat is flavor, but fat can also turn chewy. On ribs there are two kinds of fat:
-
Surface fat: A thin layer that sometimes stays on the outside. I keep a little of it – it melts slowly and keeps the meat juicy.
-
Hard, thick fat: I trim that off, because it never melts completely and mostly ends up as a tough lump.
It’s a balancing act. Too much trimming → risk of drier meat. Too little trimming → uneven texture and a bark that’s hard to get nice.
How trimming affects bark and timing
What many people miss is that trimming isn’t just for looks. It affects how the bark develops. Remove loose flaps and hard fat and you get a more even surface, and the rub binds better. When the heat then circulates, it hits every part equally, which means the ribs reach the same point at the same time. It also means you avoid some parts getting too dark while others are pale.
Swedish vs American trimming standard
In the USA, people often talk about the St. Louis cut as the gold standard: straight edges, trimmed cartilage and nice, even bones. In Sweden you usually get a more “raw” trim. Here you have two choices: either you do a quick trim and accept some variation, or you do a full St. Louis trim yourself. The latter takes 10–15 minutes extra but is worth it when you want the grill night to look as professional as it tastes.
Björn’s tip: Spend an extra quarter of an hour on the trimming when you have guests. Nice-looking racks don’t just look better – they also save you from standing there explaining why one end is dry and the other tough.

Rub, salting and brining – building flavor from the ground up
When the meat is trimmed and ready, the next magical phase begins: building flavor. Many people think the rub is just “spices on the surface”, but in fact every component does a specific job. The salt affects the proteins, the sugar controls bark and color, and the spices balance bitterness, acidity and heat. This is the foundation that decides how your ribs smell and taste when the lid is lifted.
Salting – more than just flavor
Salt has two important functions:
-
Seasoning: Obviously – salt lifts the meat’s natural sweetness.
-
Protein reactions: When the salt is given time (dry-salting for 2–12 hours), it can penetrate the meat and affect the myofibrils so they bind liquid better. The result is juicier ribs and more even seasoning.
I usually dry-salt spare ribs overnight when I have time. On baby backs a couple of hours is often enough, since they’re thinner and more sensitive.
Sugar – the secret building block of bark
Sugar is more than sweetness – it’s the engine of the bark. When the temperature reaches 212–266°F the sugar caramelizes and gives that dark, crisp surface that makes ribs look as good as they taste. But there’s a trap: too much sugar at too high a heat → a burnt, bitter surface.
Björn’s tip: If you know you’re going to cook hot & fast, that is, at a higher temperature than recommended, choose a rub with less sugar. Then you avoid black, bitter bark.
Paprika, pepper and garlic – the base of most rubs
Almost all rubs for ribs contain paprika (color + mild sweetness), black pepper (light heat + bitterness) and garlic powder (depth). Together with salt and sugar they create a base you can build on. Want more complexity? Add cumin, cayenne, mustard powder or chipotle for smoky heat.
👉 Want to dig deeper? Check out my 5 rub recipes with coffee. Coffee in the rub gives a bitter, earthy note that brings out the sweetness of the meat and gives a darker bark.
Memphis vs Kansas City – two rub philosophies
-
Memphis-style: Low sugar content, more focus on paprika, garlic and black pepper. Ribs are often served without glaze – instead you sprinkle on a little extra rub right before serving. The result: a dry, spicy surface with clear smoke flavor but still seriously good, juicy meat on the inside.
-
Kansas City-style: More sugar in the rub, preferably brown sugar or molasses powder. Here you count on a glaze at the end, so the rub is built to give a deeper sweet base. The result: sticky, caramelized ribs with more of a “candy” feel.
👉 Want to see the difference in practice? Check out my recipes for Memphis dry ribs and Kansas City ribs.
Brining – extra insurance against dry ribs
Brining means you put the meat in a saltwater solution (sometimes with sugar, herbs or juice) for several hours before grilling. The salt first draws liquid out of the meat, but then the liquid is sucked back in together with the flavor compounds. The effect is juicier meat with a slightly different texture.
I sometimes brine lean baby backs in a simple brine: 5 % salt (never more than that), 2 % sugar, enough water to cover. 8–12 hours is enough. For spare ribs, which are fattier, I usually skip the brining and dry-salt instead.
Binder – mustard, oil or nothing at all?
Many people rub ribs with mustard or oil before the rub. It doesn’t make the rub “stick better”, but it can affect the flavor. Mustard gives a little acidity that lifts the bark, and oil can help even out the surface. I usually use mustard on spare ribs and nothing at all on baby backs – the rub sticks nicely there anyway.
How much rub?
A classic rule of thumb is about 1 tbsp of rub per half kilo of meat. Too much rub can give a bitter surface where the spices take over. Too little rub makes the meat feel unfinished. Here you need to know your rub and adjust the amount to its sugar content and strength. In the end, though, only you can decide how you want it. Some prefer more, some less, so do whatever you like.
Björn’s tip: Want to really understand the rub? Make two racks: one with just salt, pepper and garlic, and one with a sweeter rub. Compare them side by side. The difference in bark and flavor balance is educational.

Fire, smoke and grill types – the road to the right flavor
BBQing ribs is at least as much about understanding the fire as understanding the meat. The fire is both your best friend and your worst enemy – treat it right and you get clean, sweet smoke and a stable temperature, but lose control and it turns bitter and uneven. When people ask me what the secret to good BBQ is, I usually say: it’s about learning to read the smoke. And you only do that through experience.
Temperature – the invisible director
For ribs you want to stay in the range 221–257°F. A lower temperature gives slow collagen conversion and deeper smoke flavor. A higher temperature shortens the time but makes it easier to burn the sugar in the rub or glaze.
-
Baby back ribs: Can handle a slightly higher temperature (up to 266–275°F) since they’re leaner and finish faster, but I recommend 100–125 degrees Celsius here too.
-
Spare ribs/St. Louis: Do best around 230–248°F – there the fat has time to melt and the meat gets juicy without drying out.
Björn’s tip: I’d rather have a steady 248°F for 6 hours than jump between 100 and 302°F. The meat cares more about stability than perfection.
👉 Feel free to read my guide Light Your Grill the Right Way if you want to understand how to get an even glow going from the start.
The character of smoke – thin blue vs thick white
There’s an old BBQ saying: “If you see thin blue smoke, you’re on the right track.” It’s just as true today.
-
Thin blue smoke: Means the fire is burning cleanly. It tastes sweet and nutty and gives a clear smoke flavor that lifts the meat.
-
Thick white smoke: Often a sign of incomplete combustion. Gives a bitter, harsh taste and can ruin the whole piece of meat.
To get clean smoke, the wood has to get oxygen. Don’t smother the fire. Think a little wood often, rather than big chunks that half-smolder.
Wood types – the taste of the landscape
Different woods give different character:
-
Oak: Neutral, stable and classic for BBQ. A perfect base for ribs.
-
Hickory: Strong, bacon-like smoke. Works best in small doses.
-
Apple: Mild, sweet smoke. Perfect for baby backs.
-
Cherry: Gives both a mild flavor and a beautiful reddish-brown color on the bark.
-
Birch (the Swedish alternative): Can work, but use it sparingly – it burns fast and can turn harsh.
Björn’s tip: Cherry + oak is my favorite blend for ribs. Oak for stability, cherry for color and fruitiness.
Grill types – different roads to the same goal
Every grill can make good ribs – it’s just a matter of knowing how to use it.
-
Kettle grill: The classic Weber style. Build a “snake” of briquettes and you get 6–8 hours of even heat. (Check out the Snake Method) Use rib racks to fit several racks.
-
Kamado (ceramic): Seriously stable, holds moisture well. Perfect for long cooks, but watch out that it doesn’t get too moist – the bark can turn softer.
-
Pellet grill: Convenient and stable, but the smoke intensity is lower than in wood-fired offsets or kettles. Feel free to run a lower temperature for the first hours if you want to get in extra smoke.
-
Offset smoker: The king of ribs. You fire in the side chamber with small splits of wood and get clean, stable smoke. It takes more work, but the reward is incredible.
-
Gas grill: Requires a smoker box or smoke tube, but it works. Keep the heat low, use an indirect zone and have patience.
👉 Curious about variations? Check out my Iberico spare ribs – an example of how the raw material and the fire together create something truly unique.
Moisture and spritz – balancing the environment
Ribs need both dry heat for bark and moisture so they don’t dry out. This is where spritz comes in (more on that in the next section), but also which grill you use. Kamado and pellet grills hold moisture naturally, while an offset often requires a water pan in the chamber.
Björn’s tip: Don’t let the water bowl sit too close to the coals. Then you boil off the liquid too fast and get only steam instead of moist air.
Methods – the road to perfect ribs
When people talk about ribs, it’s often the methods that become religion. Some swear by 3-2-1, others wrinkle their noses and say it just makes the meat too soft. Some love hot & fast because it saves time, while competition cooks shake their heads and insist the only right way is competition style. The truth? All methods work – if you understand why they exist and when to use which.
The 3-2-1 method – the classic for spare ribs
3 hours of smoke, 2 hours wrapped, 1 hour with glaze. Total 6 hours. This is the method most beginners start with because it’s forgiving and gives really tender ribs. The phase in foil or butcher paper makes the meat almost steam, which breaks down collagen quickly.
-
Pros: Juicy, hard to fail, good for spare ribs with plenty of connective tissue.
-
Cons: Can get too soft – “fall off the bone” rather than the classic “bite”.
👉 Want to see 3-2-1 in practice? Check out my recipe for Whisky Ribs in Foil.
Björn’s tip: If you like 3-2-1 but want a little more “bite” – shorten the wrap phase to 1.5 hours. Then you get a balance between juiciness and chew.
The 2-2-1 method – for baby backs
Baby backs are thinner and don’t need as long. Here you do 2 hours of smoke, 2 hours wrapped, 1 hour of glaze. Total 5 hours. The result is tender but with more structure left.
-
Pros: Suits leaner racks, keeps a bit more texture.
-
Cons: Requires more precision – cook them too long and they get dry.
👉 One of my favorite recipes is Cider-Brined Baby Backs, where the 2-2-1 method really lifts the fruity flavor.
Hot & fast – for the impatient
Here you cook at slightly higher heat (275–302°F) and shorten the whole process to 3–4 hours. Bark and glaze have time to set, but the risk is that the sugar in the rub burns and that the meat turns out uneven. Perfect for weeknight ribs or when the guests are already standing around fidgeting.
-
Pros: Fast, good bark, intense flavor.
-
Cons: Small margin for error, requires experience.
Björn’s tip: Want to go hot & fast? Use a rub with less sugar, otherwise you risk a black surface that tastes bitter.
No-wrap – the best friend of bark
As the name suggests: here you skip the foil or paper and leave the ribs uncovered all the way. The time lands at 5–6 hours. The result is a heavy bark and clear smoke flavor, but the risk is that the meat gets drier.
-
Pros: Incredible bark, maximum smoke flavor.
-
Cons: Requires attention to moisture and spritz, otherwise it gets dry.
👉 Curious how it turns out? Try my recipe for Memphis Dry Ribs – there you get no-wrap in its purest form.
Competition style – for the perfect presentation
In BBQ competitions, ribs are an art form. Here every bone has to be alike: equally glossy, equally tender, equally balanced. Competition cooks trim their racks to perfection, often run them 2½–2–½ with exact control of heat and glaze. The goal is ribs so tender that the tooth slides through cleanly – but not so tender that the meat falls off the bone.
-
Pros: Perfect balance between tenderness, glaze and presentation.
-
Cons: Requires a lot of practice and precision.
👉 Want to try the competition style at home? Check out my Memphis Style Wet Ribs as a good starting point.

Method comparison at a glance
| Method | Time | Tenderness | Bark | Best suited for |
|---|---|---|---|---|
| 3-2-1 | 6 h | Very tender | Softer | Spare ribs |
| 2-2-1 | 5 h | Tender + bite | Just right | Baby backs |
| Hot & fast | 3–4 h | Varies | Strong | Quick ribs |
| No-wrap | 5–6 h | Bite/risk of dry | Strong | Bark lovers |
| Competition style | 5 h | Perfect balance | Controlled | St. Louis cut |
Björn’s tip: There are no magic numbers. Always go by feel: the bend test, the toothpick test and how the meat looks. Schedules are guidelines – flavor is the end goal.
Spritz, wrap and glaze – the techniques that shape the surface
When the bark has set on a rack of ribs, the next chapter of the journey begins: how you control moisture, how you balance juiciness and how you build that perfect surface that gleams in the evening sun. This is where spritz, wrap and glaze come into the picture. They’re tools, not rules, and they have to be used with a fine touch.
Spritz – the role of moisture in BBQ
A spritz is basically a simple spray of liquid that you apply to the meat during the cook. The purpose is threefold:
-
Keep the bark from drying out.
-
Build layers of flavor – apple juice, vinegar, beer or even whisky can add subtle notes.
-
Control the surface temperature – every spray cools a little and makes the bark develop more slowly.
But there’s a trap: if you start spraying too early you can wash off the rub. I only spritz when the bark looks dry and sets, often after 90 minutes to 2 hours.
Common spritz mixes:
-
100 % apple juice – classic and mild.
-
50/50 apple cider vinegar + water – tangier, good for balancing a sweet glaze.
-
Beer – gives a light malty note, perfect on spare ribs.
-
Whisky or bourbon – a more luxurious variant, but use it sparingly.
Björn’s tip: Want really even spritzing? Use a plant mister with a fine mist. Nothing kills a bark faster than big drops that wash the rub away.
Wrap – when you close in the meat
After a couple of hours in the heat of the smoke, ribs often reach a point where moisture evaporates faster than it is replaced – the famous stall. Here you can choose to wrap the meat, a method that both speeds up the journey and locks in the juiciness.
-
Foil: Gives almost steaming. Fast, juicy, but with a risk that the bark turns soft. Perfect if you want fall-off-the-bone.
-
Butcher paper: A competition favorite. Lets steam through but holds moisture. Result: juicy ribs with a bark that still bites back.
In the wrap phase you can also add a little liquid – a splash of apple juice, beer or a dab of butter – to build extra flavor.
Björn’s tip: Always use a double layer of foil. There’s nothing more annoying than the meat juices leaking out into the bottom of the smoker instead of staying with the ribs – though I prefer butcher paper.
Glaze – the glossy finale
The glaze is the crowning touch. It should give sweetness, shine and a lightly sticky surface that makes the meat look as beautiful as it tastes. But glaze is also the most misunderstood part. Do it wrong and it gets burnt, tough or just a thick sugar paste. Do it right and you get a thin, even coating that melts into the bark.
-
When should it go on? The last 15–20 minutes.
-
How often? Rather two thin layers than one thick one.
-
What heat? Stay around 212–248°F. At higher temperatures the sugar burns quickly.
Examples of glaze variants:
-
Classic Kansas City – sweet, dark and glossy.
-
Fruity – e.g. apple or cherry, perfect on baby backs.
-
Swedish twist – Julmust Glaze, which gives both sweetness and tang.
-
Cola-based – Coke BBQ Sauce is an example where caramelized sugar turns into magic.
Björn’s tip: Try reducing the glaze in a saucepan for 5–10 minutes before you brush it on. Then it’s more concentrated and doesn’t burn as easily.
Spritz, wrap and glaze – how they work together
The important thing to understand is that the three techniques aren’t standalone. They build on each other:
-
The spritz keeps the bark moist until it has set.
-
The wrap lets the meat get through the stall without drying out.
-
The glaze turns the ribs from “good” to “wow” by adding both flavor and presentation.
That’s why competition cooks spend so much time fine-tuning every step. Small details in the spritz and glaze can decide whether you take home the trophy or not.
Doneness test & temperature – when are ribs actually done?
There are few questions I get more often than: “At what temperature are ribs done?” And the answer is: there is no magic number. Ribs aren’t a ribeye that’s medium rare at 131°F. Here we’re talking about collagen, fat and connective tissue that slowly have to melt and turn into soft gelatin. Temperature is just one tool – the real test you do with eye, hand and tongs.
The transformation of collagen
Ribs consist largely of muscles that have worked hard. These contain a lot of collagen, a protein that is tough at low temperatures but breaks down into gelatin between 190–205°F. That’s why low & slow works: you give the heat time to turn tough tissue into something that melts in your mouth.
Björn’s tip: Remember that the temperature in the smoker isn’t the same as in the meat. A stable grill is your best friend – I’d rather have a steady 248°F than jump between 100 and 150.
👉 Want to understand more about low & slow? Read my big guide to brisket, where the same principles apply.
Temperature as a benchmark
-
Baby back ribs: Usually feel done around 190–196°F.
-
Spare ribs/St. Louis: Often a little higher, 196–203°F, since they have more connective tissue.
But remember: these are benchmarks, not an answer key. Two racks from the same pig can behave completely differently.
Bend test – the classic
Lift the ribs with tongs in the middle. Bend them gently. If they’re done, the bark on top cracks and the meat almost starts to split. Do they fall completely off the bone? Then you’ve gone a little too far. Are they stiff? Then they need more time.
Toothpick test – the feel in your hand
Stick a toothpick between the bones. If it goes in and out without resistance, almost like into butter, the ribs are done. If it catches? Then the collagen isn’t finished yet.
Bone pullback – a visual indicator
When the ribs are done, the meat has pulled back so that the ends of the bones stick out about ¼–½ in. It’s not an absolute measure, but a good sign that you’re getting close to the goal.
When different methods affect the tests
-
3-2-1: The wrap phase makes the ribs extra tender. Here the bend test can feel “too” soft.
-
No-wrap: Requires you to rely more on the toothpick test since the bark can be harder.
-
Hot & fast: Harder to read because the heat works faster – here the thermometer is extra useful as support.
Björn’s tip: Always combine at least two tests. I usually probe with a toothpick and then do the bend test. If both agree, then I know it’s time.

Four rib recipes – classics and favorites
It’s one thing to talk about rubs, methods and glaze in theory. It’s something else entirely to stand there at the grill with your hands full of tongs, spritz bottle and BBQ sauce. That’s why I want to give you four clear recipes – the way I make them at home myself. All of them build on the principles we’ve gone through, but with different character.
3-2-1 Spare Ribs – the reliable classic
To me, 3-2-1 is the method that really teaches patience. This is where you understand that BBQ isn’t about rushing a result, but about letting the meat follow its own journey. Perfect when you want juicy spare ribs that always turn out well.
You need:
-
1 rack spare ribs (about 3 ¼ lb)
-
3 tbsp rub (preferably Kansas City style)
-
¾ cup + 1½ tbsp apple juice (for the spritz and the wrap)
-
2 tbsp butter
-
⅓ cup + 1½ tbsp glaze (e.g. Coke BBQ Sauce)
Method:
-
Trim the ribs and remove the membrane.
-
Dry-salt for a couple of hours, then rub in the rub.
-
Smoke at 230–248°F for 3 hours. Spray with apple juice every 45–60 minutes.
-
Wrap in foil with a little apple juice and butter. Cook for 2 hours.
-
Take off the foil, brush on the glaze and cook another 1 hour without the lid.
-
Lift off and let rest 10 minutes before serving.
2-2-1 Baby Back Ribs – quick and fruity
Baby backs are my favorites when I want something a little lighter but still full of flavor. They take less time than spare ribs and love fruity rubs and glazes.
You need:
-
1 rack baby back ribs (about 2 ½ lb)
-
2 tbsp rub with some fruity notes (preferably with paprika and cayenne)
-
⅓ cup + 1½ tbsp apple juice (spritz)
-
⅓ cup + 1½ tbsp fruity glaze (try Julmust Glaze)
Method:
-
Trim the ribs and remove the membrane.
-
Rub it in, let sit at least 1 hour.
-
Smoke at 248–257°F for 2 hours, spritz once after 90 minutes.
-
Wrap in butcher paper with a splash of apple juice and cook for 2 hours.
-
Take off the paper, brush on the glaze and cook 1 hour more.
-
Serve right away with a tangy coleslaw.
Memphis Dry Ribs – the rub in the lead role
When I was in Tennessee for the first time I ordered Memphis dry ribs and suddenly understood what BBQ without glaze can be. Here it’s the rub and the smoke that get to speak, not a sticky surface. The result is drier on the outside but full of flavor, with a bark that bites back.
You need:
-
1 rack St. Louis cut ribs
-
3 tbsp Memphis rub (salt, black pepper, paprika, garlic, cayenne)
-
Extra rub to sprinkle on when serving
Method:
-
Trim the ribs to a St. Louis cut.
-
Rub in generously, let sit 1–2 hours.
-
Smoke at 230–248°F for 5–6 hours, no wrap, until they pass the bend test.
-
Lift off, sprinkle on a little extra rub when serving.
👉 Want to think a bit outside the box? Try our Babylon Baby Back Ribs.
Kansas City Wet Ribs – glossy and sweet
These are ribs that gleam like freshly waxed cars in the evening sun. Sweet glaze, a little smoke and a rub with a higher sugar content give them a caramelized surface that’s hard to resist.
You need:
-
1 rack spare ribs
-
3 tbsp Kansas City rub (sweeter, preferably with brown sugar)
-
⅓ cup + 1½ tbsp glaze (e.g. Coke BBQ Sauce)
Method:
-
Trim the ribs and remove the membrane.
-
Rub it in, let sit 1 hour.
-
Smoke at 230–239°F for 3 hours.
-
Wrap in foil for 2 hours to keep it juicy.
-
Take off, brush on the glaze and cook 30–45 minutes until the surface shines.
👉 Want to take it a step further? Try my Bacon-Wrapped Ribs with Coca-Cola Glaze.
Why several recipes?
Giving you four variations isn’t about complicating things, but about showing the range. Same raw material, same grill, but four completely different results. And that’s exactly what makes ribs so much fun: you can let mood, guests and season decide which road you take.
Björn’s tip: Make two different variations at the same time. It’s incredibly educational to taste the difference side by side – and your guests will love the comparison.
Troubleshooting – when the ribs don’t behave
It doesn’t matter whether you’ve stood at the grill for two months or twenty years – sooner or later you run into problems. Ribs are forgiving but also revealing. Make a mistake and it shows immediately in bark, texture and flavor. Here are the most common problems, why they happen and how to fix them.
Dry ribs
Why?
-
Too much heat for too long.
-
Too little fat in the rack (common in baby backs).
-
No wrap, or wrapping too late.
Fix:
-
Lower the heat to 230–248°F and keep it stable.
-
Choose spare ribs or St. Louis if you want juicier results.
-
Wrap earlier and add liquid to the package.
Too soft ribs – fall off the bone
Why?
-
Too long a wrap phase in 3-2-1 or 2-2-1.
-
Too much liquid in the foil.
-
Too high an internal temperature.
Fix:
-
A shorter wrap – try 1.5 hours instead of 2.
-
Use butcher paper instead of foil to keep a little structure.
-
Try the bend test instead of just following the clock.
Björn’s tip: Many people think “fall off the bone” is the ideal, but it’s actually a myth. Ribs should have a little resistance – like perfectly cooked al dente pasta.
Burnt glaze
Why?
-
Too much heat when you put the glaze on.
-
Too much sugar in both the rub and the glaze at once.
-
The glaze went on too early.
Fix:
-
Apply the glaze in the last 15–20 minutes.
-
Use thin layers, preferably twice instead of one thick one.
-
Cook the ribs at 230–248°F when you glaze.
Bitter taste
Why?
-
Too much smoke with too little oxygen (thick white smoke).
-
Too much hickory or birch at once.
-
Wood that is too wet.
Fix:
-
Go for thin blue smoke, adjust the vents for more oxygen.
-
Use oak or fruit wood as a base, add a little hickory if you want power.
-
Store the wood dry for at least 6 months.
👉 Need a crash course in smoke? Read our guide to smoking wood
Tough film
Why?
-
The membrane is still on.
-
Uneven trimming.
Fix:
-
Always pull off the membrane before the rub goes on.
-
Trim evenly so the heat spreads properly.
👉 Unsure about trimming? Check out my guide How to Trim Ribs.
Troubleshooting table
| Problem | Common cause | Fix |
|---|---|---|
| Dry ribs | Too much heat, no wrap | Lower heat, wrap earlier, choose spare ribs |
| Too soft | Too long a wrap phase | Shorter wrap, use butcher paper |
| Burnt glaze | Too much heat, put on too early | Apply the glaze last, two thin layers |
| Bitter taste | Dirty smoke, wet wood | More oxygen, dry wood, thin blue smoke |
| Tough film | Membrane left on | Remove the membrane, trim evenly |
Björn’s tip: Always take notes. Write down temperature, time, rub, wood and method every time you make ribs. That’s how you grow from good to great.
Serving, sides and presentation – when the ribs get to shine
For me, the serving is half the experience. You can have spent six hours smoking ribs, but if you cut them carelessly or pair them with the wrong sides, you lose the effect. When you instead put out a board where every bone gleams, where the sides are well thought out and where everything smells like a BBQ restaurant in the southern USA – then the magic happens.
Cutting technique – how to get nice individual ribs
-
Always lay the rack bone side up when you cut. Then you see exactly where the bones run.
-
Use a sharp, long knife – preferably a slicing knife.
-
Cut between the bones with calm strokes, not by pressing.
-
Want “money shots” for guests or photos? Cut three bones together so you get a substantial piece with perfect glaze and bark.
Björn’s tip: Let the ribs rest 10–15 minutes before you cut. Then the juices settle and you get cleaner cuts.
Sides – building the perfect BBQ plate
Ribs are rich and intensely flavored. That’s why they need sides that complement, not compete.
-
Tangy & fresh: Coleslaw is a classic. The creamy acidity balances the fattiness of the ribs. 👉 See my Coleslaw Bible to make it really good.
-
Hearty & smoky: BBQ beans are almost made for ribs. The sweetness and smokiness build on the flavors. 👉 Try The World’s Best BBQ Beans.
-
Tangy & light: Pickled red onion gives a sour contrast that lifts the whole meal. 👉 See my guide Pickled Red Onion.
-
Starch: Corn on the cob, potato salad or cornbread. They soak up sauce and give the balance that lets guests manage another portion.
Serving matrix – matching ribs with sides
| Rib style | Best with |
|---|---|
| Kansas City wet | Coleslaw + pickled red onion |
| Memphis dry | BBQ beans + potato salad |
| 3-2-1 spare ribs | Coleslaw + corn on the cob |
| 2-2-1 baby backs | Tangy cabbage salad + fruity glaze |
| Competition style | Cornbread + simple green salad |
Putting the plate together
When I build a plate I think balance:
-
Ribs for meat and smoke.
-
Coleslaw for acidity.
-
BBQ beans for sweetness and depth.
-
Something green or pickled for freshness.
That’s also why I often make several variations of ribs on the same evening. The guests get to compare and see how the sides behave with different styles. It becomes an experience rather than just dinner.
Björn’s tip: Don’t put the ribs on top of the coleslaw or beans on the plate – keep them separate. Then each guest can mix for themselves, and the bark on the ribs stays intact.
Storing, keeping warm and reheating – keeping ribs good all the way
I don’t know how many times I’ve been there: the ribs are perfect, but the guests are stuck in traffic. Or I’ve made too many racks (yes, it actually happens) and want to save some for the next day. Then you need to know how to hold and reheat them without the ribs losing their soul.
Holding warm – when the timing falls apart
BBQ is rarely exact to the minute. That’s why holding warm is one of the most useful tricks.
-
The oven: Lay the ribs tightly in a pan, cover loosely with foil and set it to 158–176°F. There they stay warm for up to two hours.
-
The cooler method: Wrap each rack in foil, wrap it in a towel and place it in a clean cooler. The residual heat keeps them warm for 2–3 hours. Perfect when you’re taking ribs to a friend or when the grill is already occupied by something else.
Björn’s tip: Always put a little liquid (apple juice or stock) in the foil if you hold longer than an hour. It keeps the ribs from drying out.
Storing – when you want to save some for the next day
Ribs are often even better on day two because the flavors have time to marry.
-
Fridge: Wrap the racks in foil or vacuum seal them. Keeps 3–4 days.
-
Freezer: Vacuum-sealed ribs keep at least 3 months. Remember to write the date and the style on the package – otherwise the freezer becomes a BBQ labyrinth.
👉 Feel like freezing some for the next BBQ night? Do it in portions and serve with fresh sides like coleslaw or pickled red onion when you reheat.
Reheating – the secret to avoiding dry ribs
Here you need to heat slowly and gently.
-
Oven: 212–248°F, with the ribs wrapped in foil with a splash of liquid. Takes 30–40 minutes depending on thickness.
-
Sous vide: Vacuum-sealed ribs in a water bath, 140–149°F for 1 hour. Gives an almost freshly cooked feel.
-
Grill: Indirect heat, 230–248°F, 20–30 minutes. Perfect if you want to refresh the bark with a new glaze at the end.
Björn’s tip: If you reheat in the oven or on the grill – brush on a little new glaze for the last 10 minutes. It gives both shine and the feeling that they just finished.
When is it better to start over?
Do you have ribs that have sat too long in the fridge and lost their bark? Pull the meat off the bones and make pulled pork-style sandwiches instead. Mix with a BBQ sauce and you have a new dish no one will guess started out as leftovers.
A final reflection
There’s something special about ribs. For me they are the schoolroom of BBQ – everything you need to learn about fire, meat and patience is in those bones. Do you fail? Then you notice right away. Do you nail it? Then nothing beats that first bite of a perfect rib.
I love how different styles tell different stories. Memphis dry ribs – clean, spicy and smoky. Kansas City wet – glossy and caramelized. Spare ribs in 3-2-1 that turn out juicy as candy, and baby backs in 2-2-1 with just the right amount of “bite”. The beauty of it is that there is no one right way. Only your way.
And that’s exactly why I never get tired of it. Ribs aren’t just a recipe, they’re a journey. Every grill, every rack and every guest offers a new interpretation. And that’s the journey I hope you’ll want to continue together with me – because we’ve only started scratching the surface of everything BBQ can be.
👉 Want to nerd out even more on styles and variations? Feel free to check out my list of 12 rib recipes.
Björn’s tips – collected from the article
-
Round off the corners when you trim ribs – more even cooking and nicer bark.
-
Spray only once the bark has set – otherwise you wash off the rub.
-
Rather two thin layers of glaze than one thick one.
-
Always go by the bend and toothpick tests, not just the clock.
-
Cherry + oak is an unbeatable combo for ribs.
-
Take notes every time – it’s the road from good to great.


